# Snapix - Modern TailwindCSS Personal Portfolio React Nextjs Template Documentation.
# Getting Started
Item Name : Snapix - Modern TailwindCSS Personal Portfolio React Nextjs Template
Item Version : v1.0.0
Author : MKTemplateWizard
# Files Included
Do not directly upload the zip file you downloaded from TemplateMonster. To begin, unzip the TemplateMonster file you just downloaded.
Key features :
- Next.Js 13+
- React.JS
- Tailwind Css v3+
- Light & Dark Verson
- Responsive Design
- Google Fonts
- Clean and commented code
- Customizeable all components of each page
- Easy to customize
- Detailed documentation
- 24/7 Support
# Files Structure
snapix/ + ├───app │ ├───components │ ├───context │ ├───hooks │ ├───data.js │ ├───global.css │ ├───custom.css │ ├───page.js │ ├───layout.js │ ├───public │ └───assets │ ├───images │ ├───.eslintrc.json ├───.gitignore ├───jsconfig.json ├───next.config.json ├───package.json ├───postcss.config.js ├───readme.md ├───tailwind.config.js +Help: For detailed explanation on how things work, check out Next.js docs.
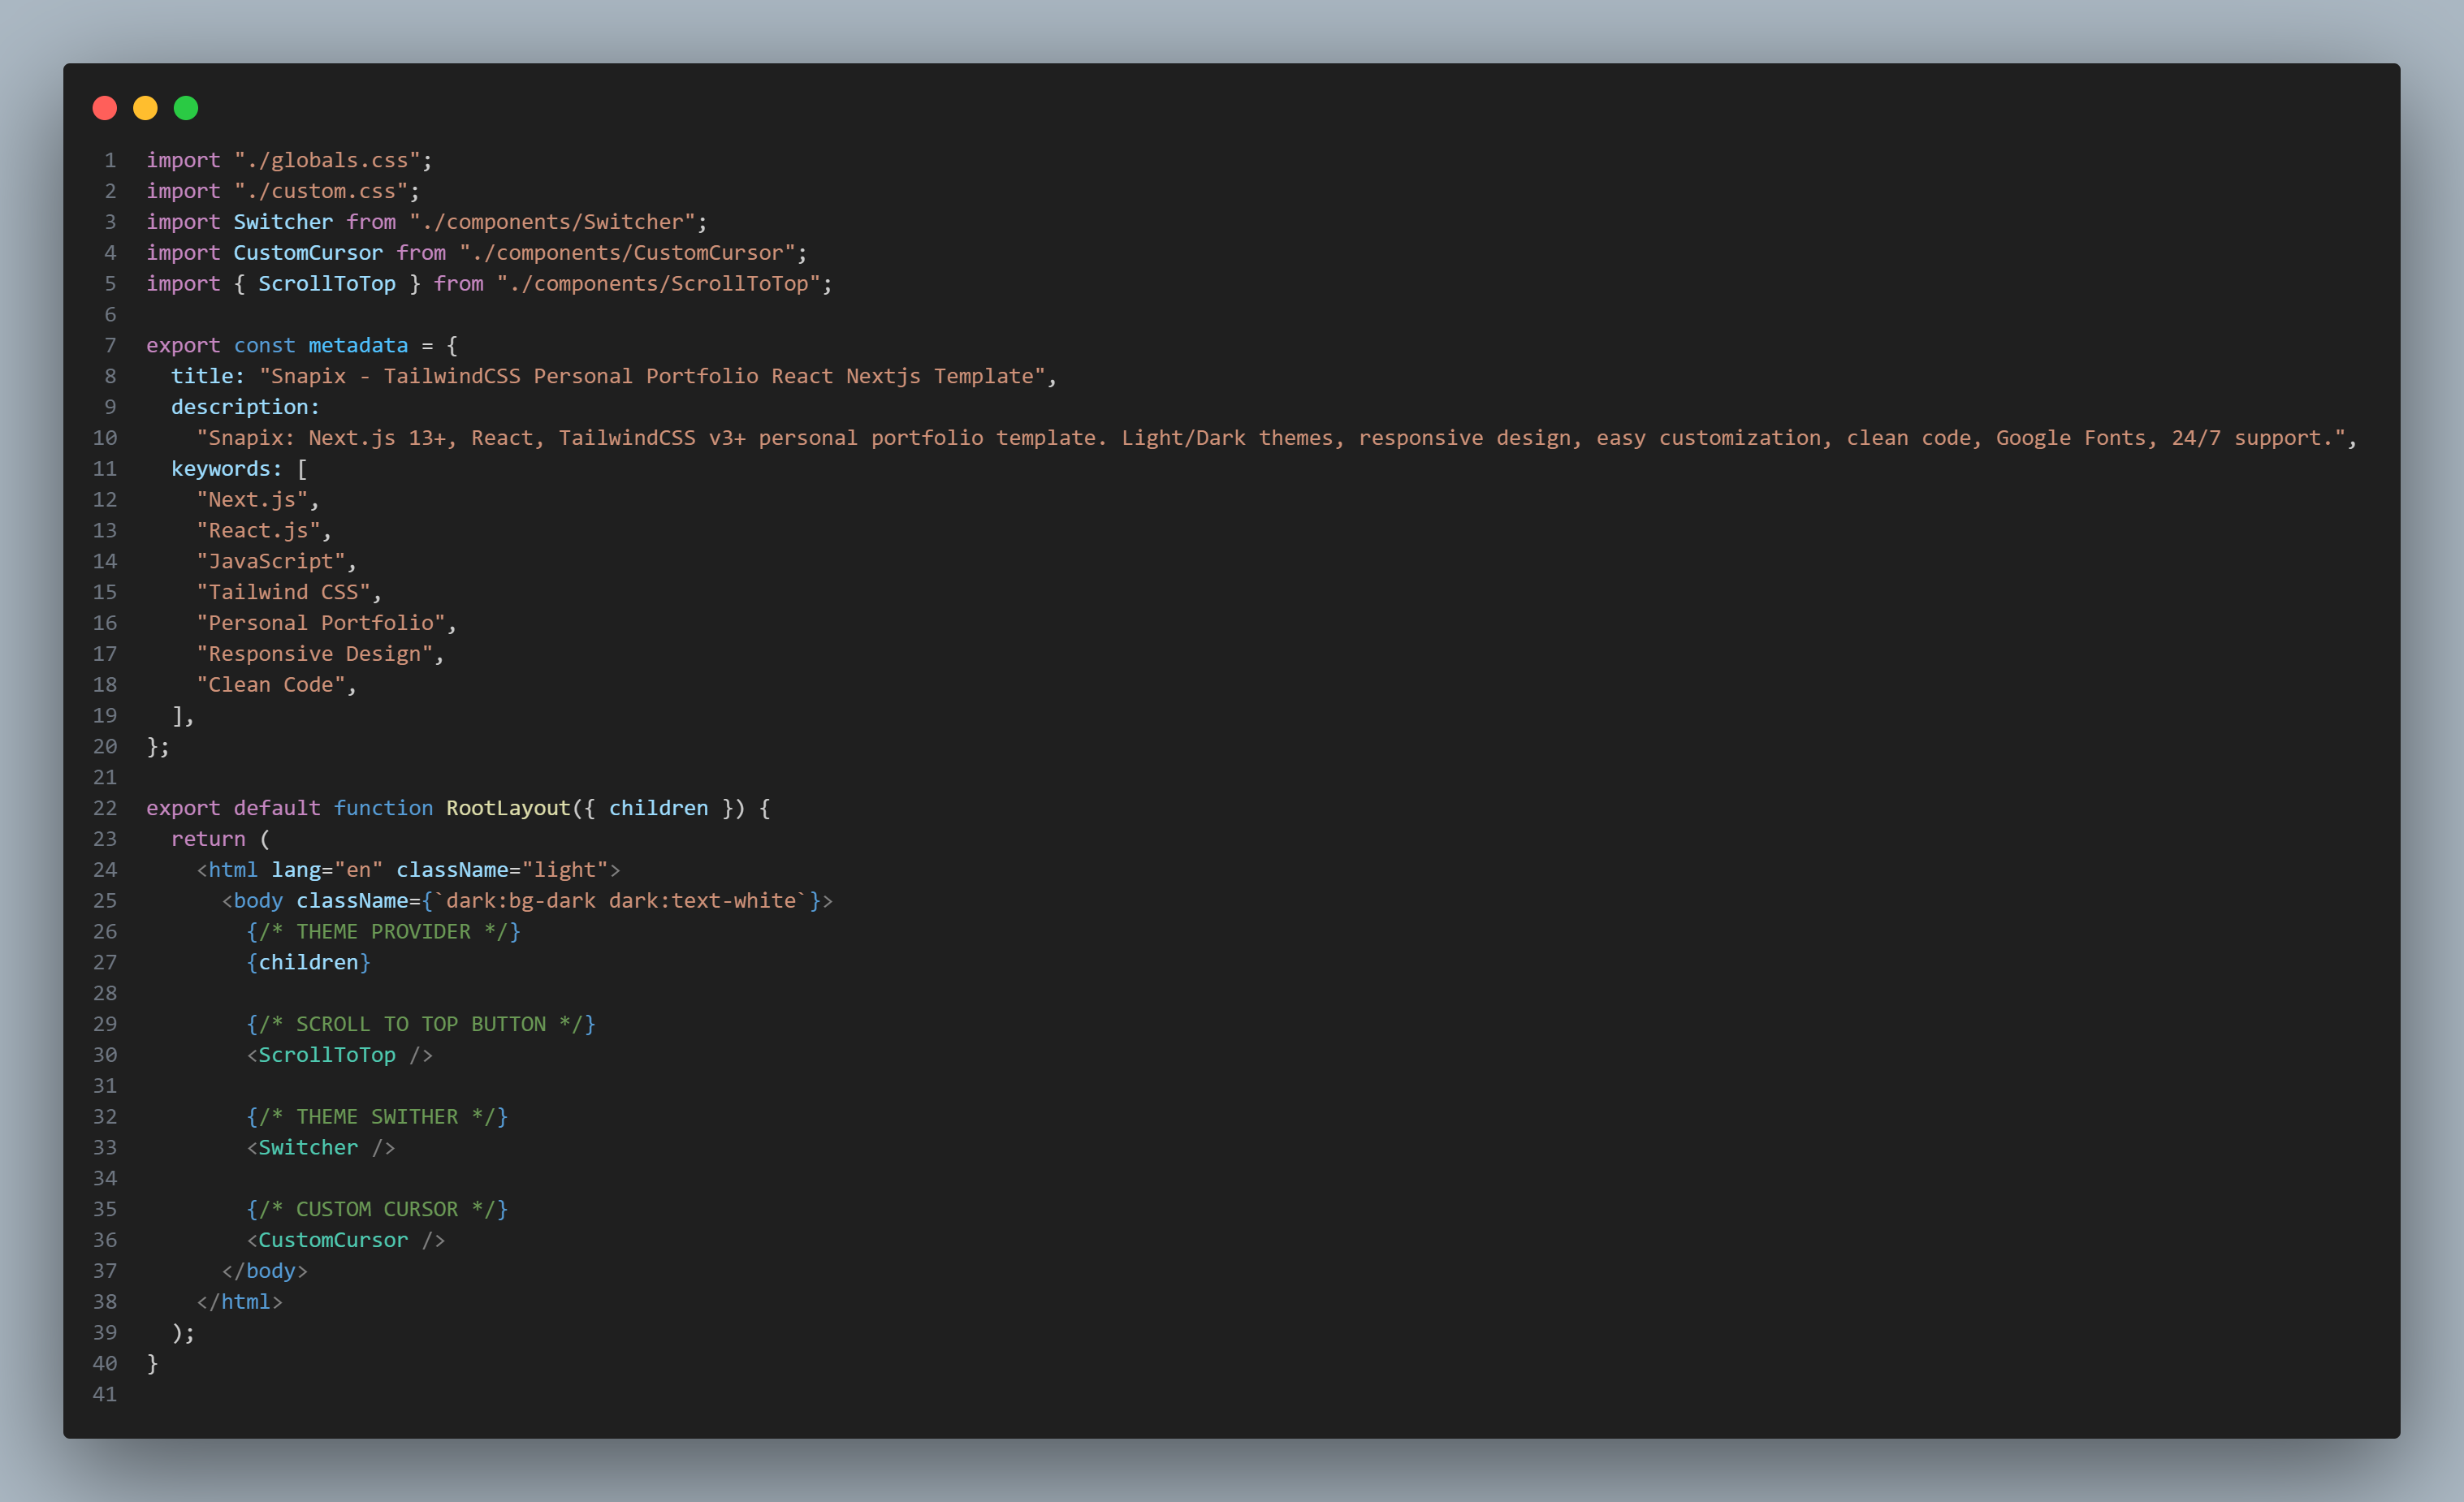
# Layout Structure
snapix/app/layout.js
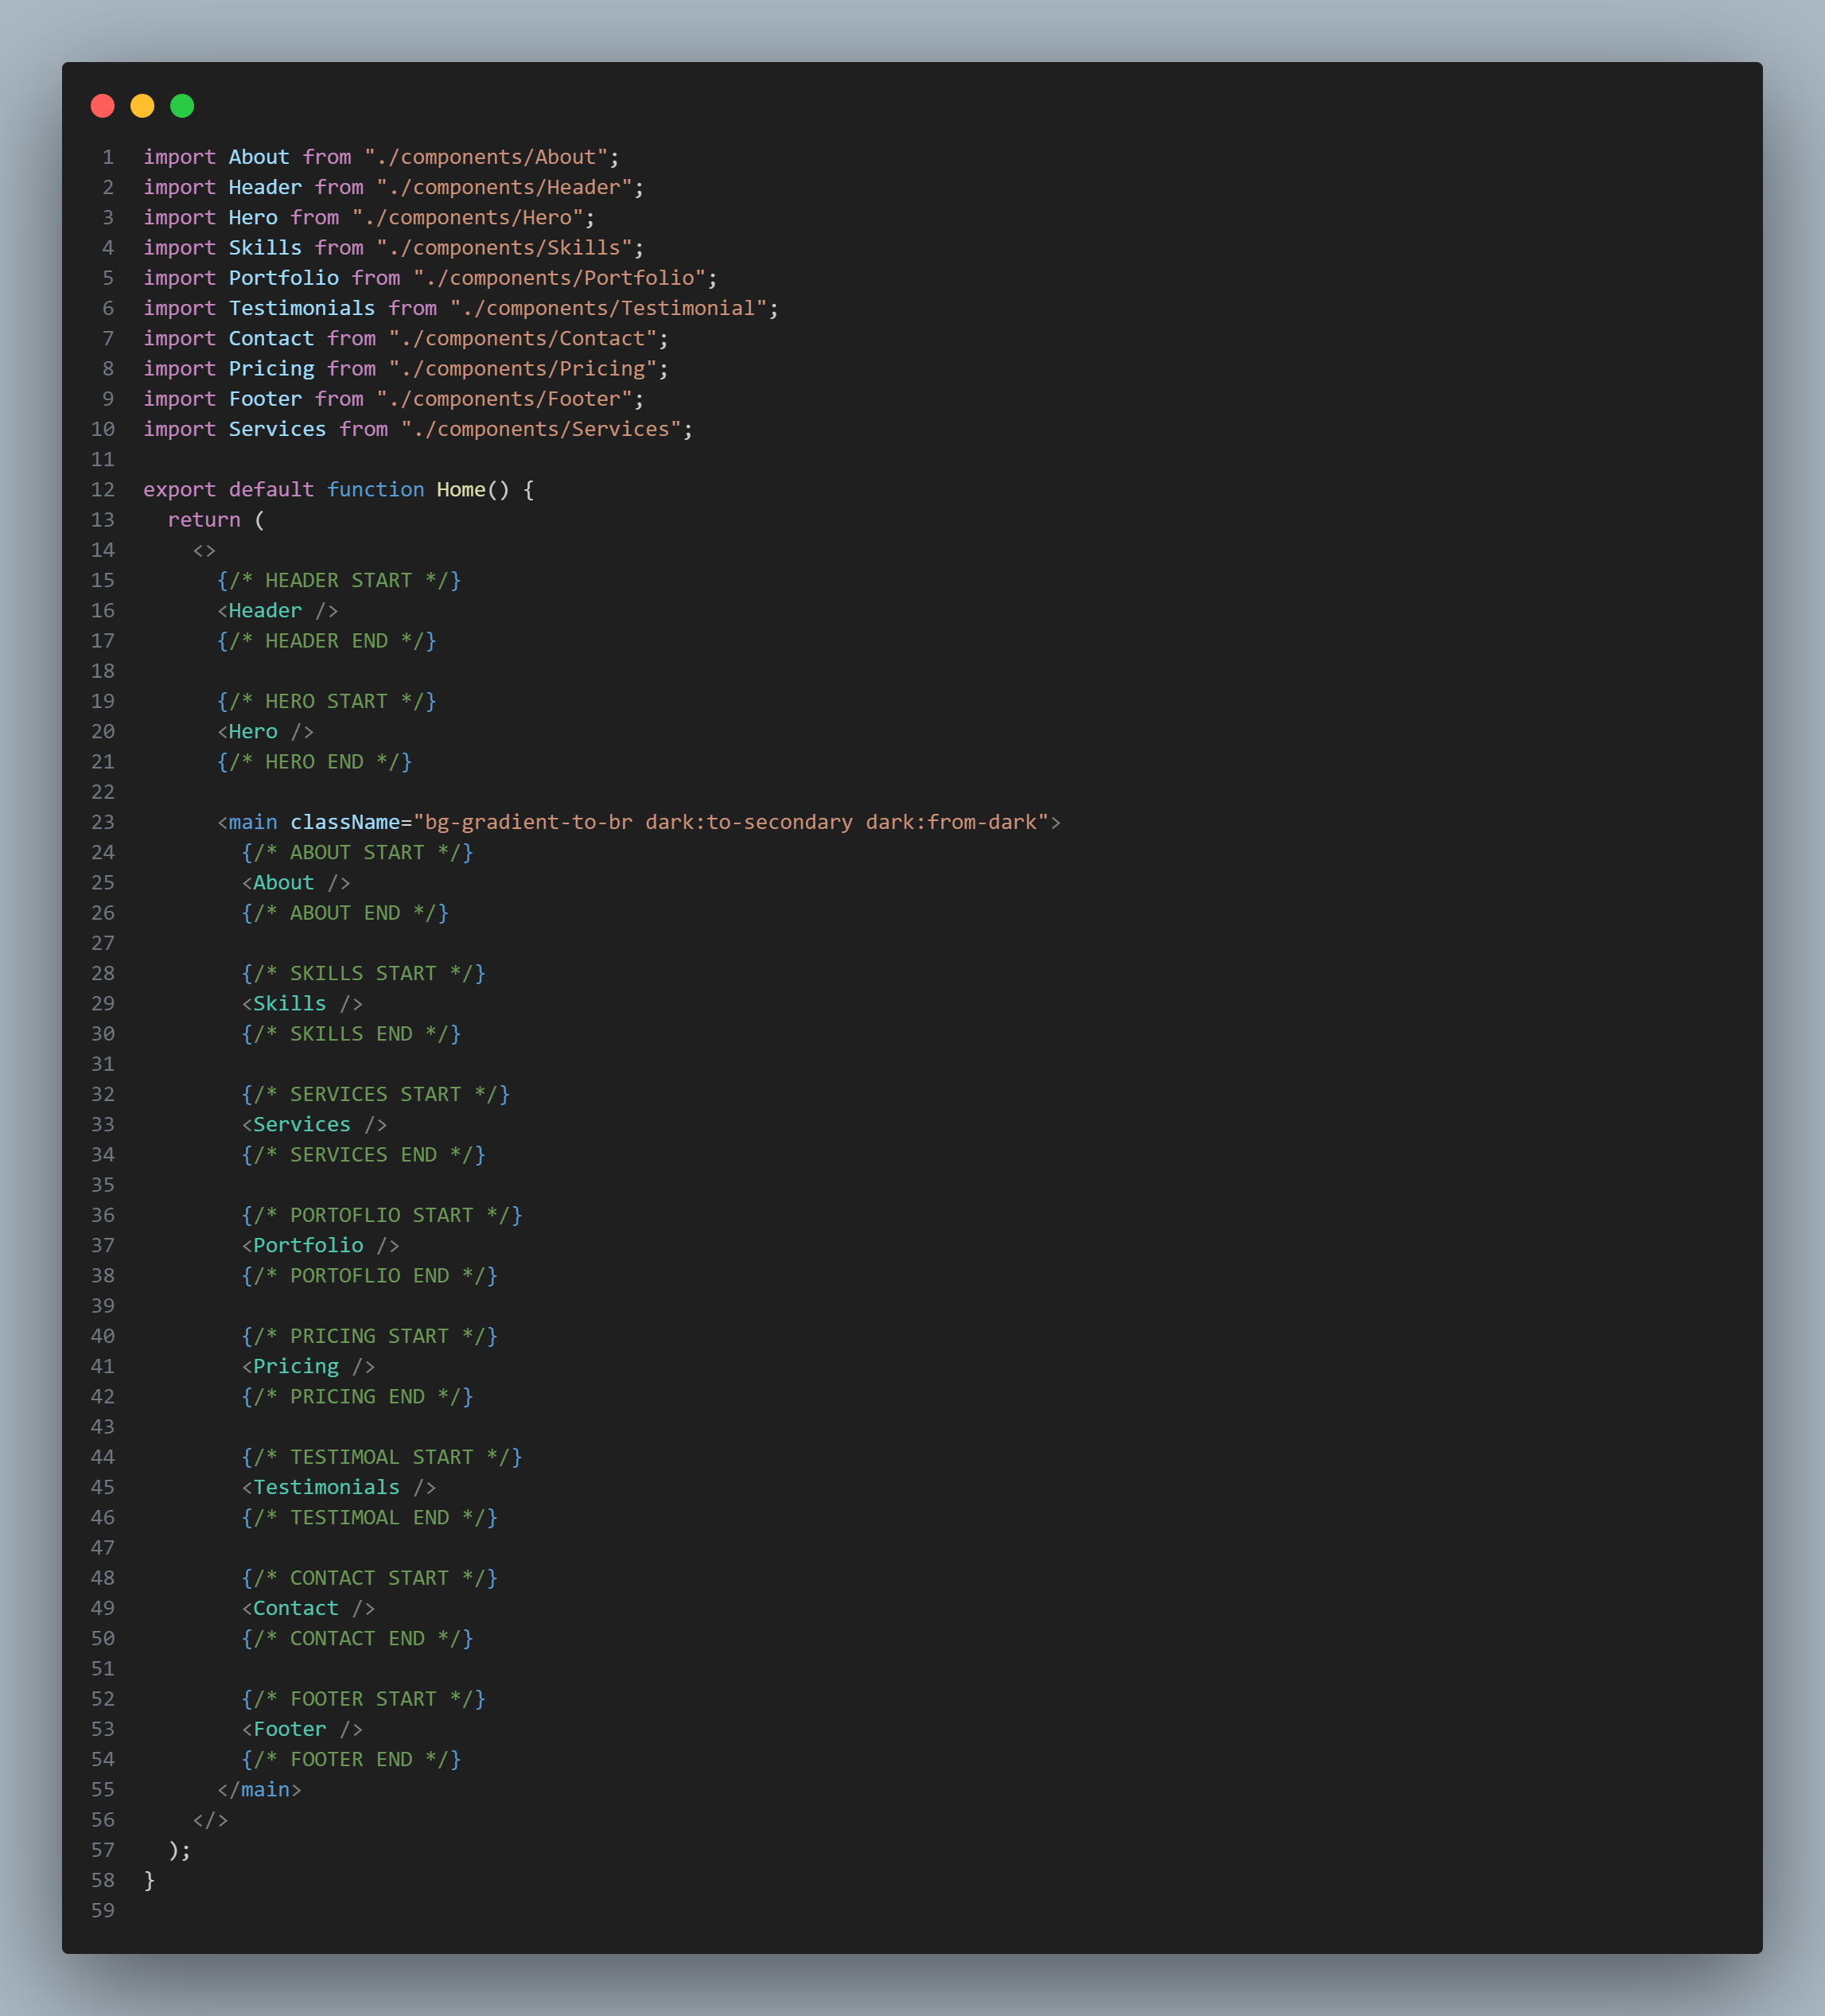
# Home / Main Page Structure
snapix/app/page.js
# Google Fonts Include
snapix/app/custom.css

# Local installation and Setup
To changing content, you will need to install it as a development dependency in your project. Here are the steps you can follow to do this:
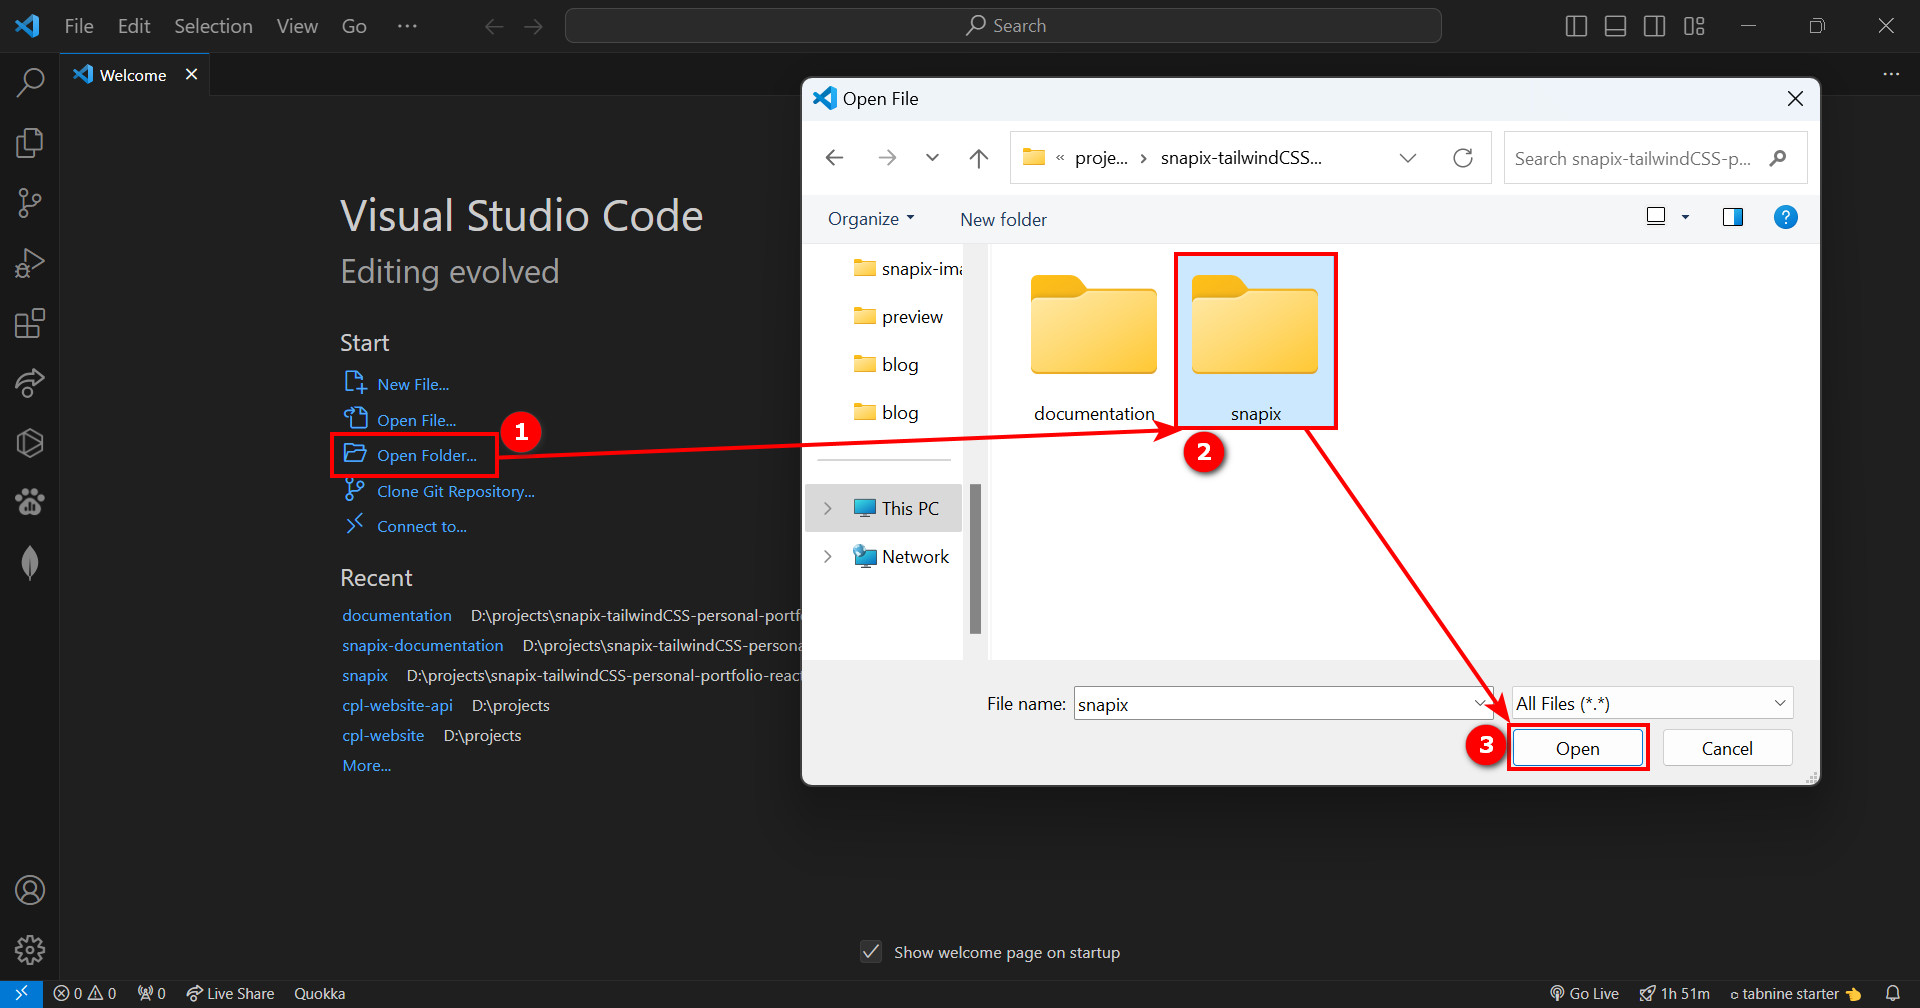
1. First unzip snapix.zip you will find two
folders including snapix (this is your root
folder). Open this folder with VS Code (or any other you
like). And follow step below.
2. Make sure you have
Node.js and npm ( the package
manager for Node.js ) installed on your computer. If you don't
have them already, you can download and install them from the
official website (https://nodejs.org).
2. Open project on your editor.
3. Open the terminal as a root directory.
4. Run the command to install node module package :
                  npm install
//===== or

                  yarn install
5. To run snapix on your computer run this command in your
terminal :
npm run dev
//===== or

                  yarn run dev
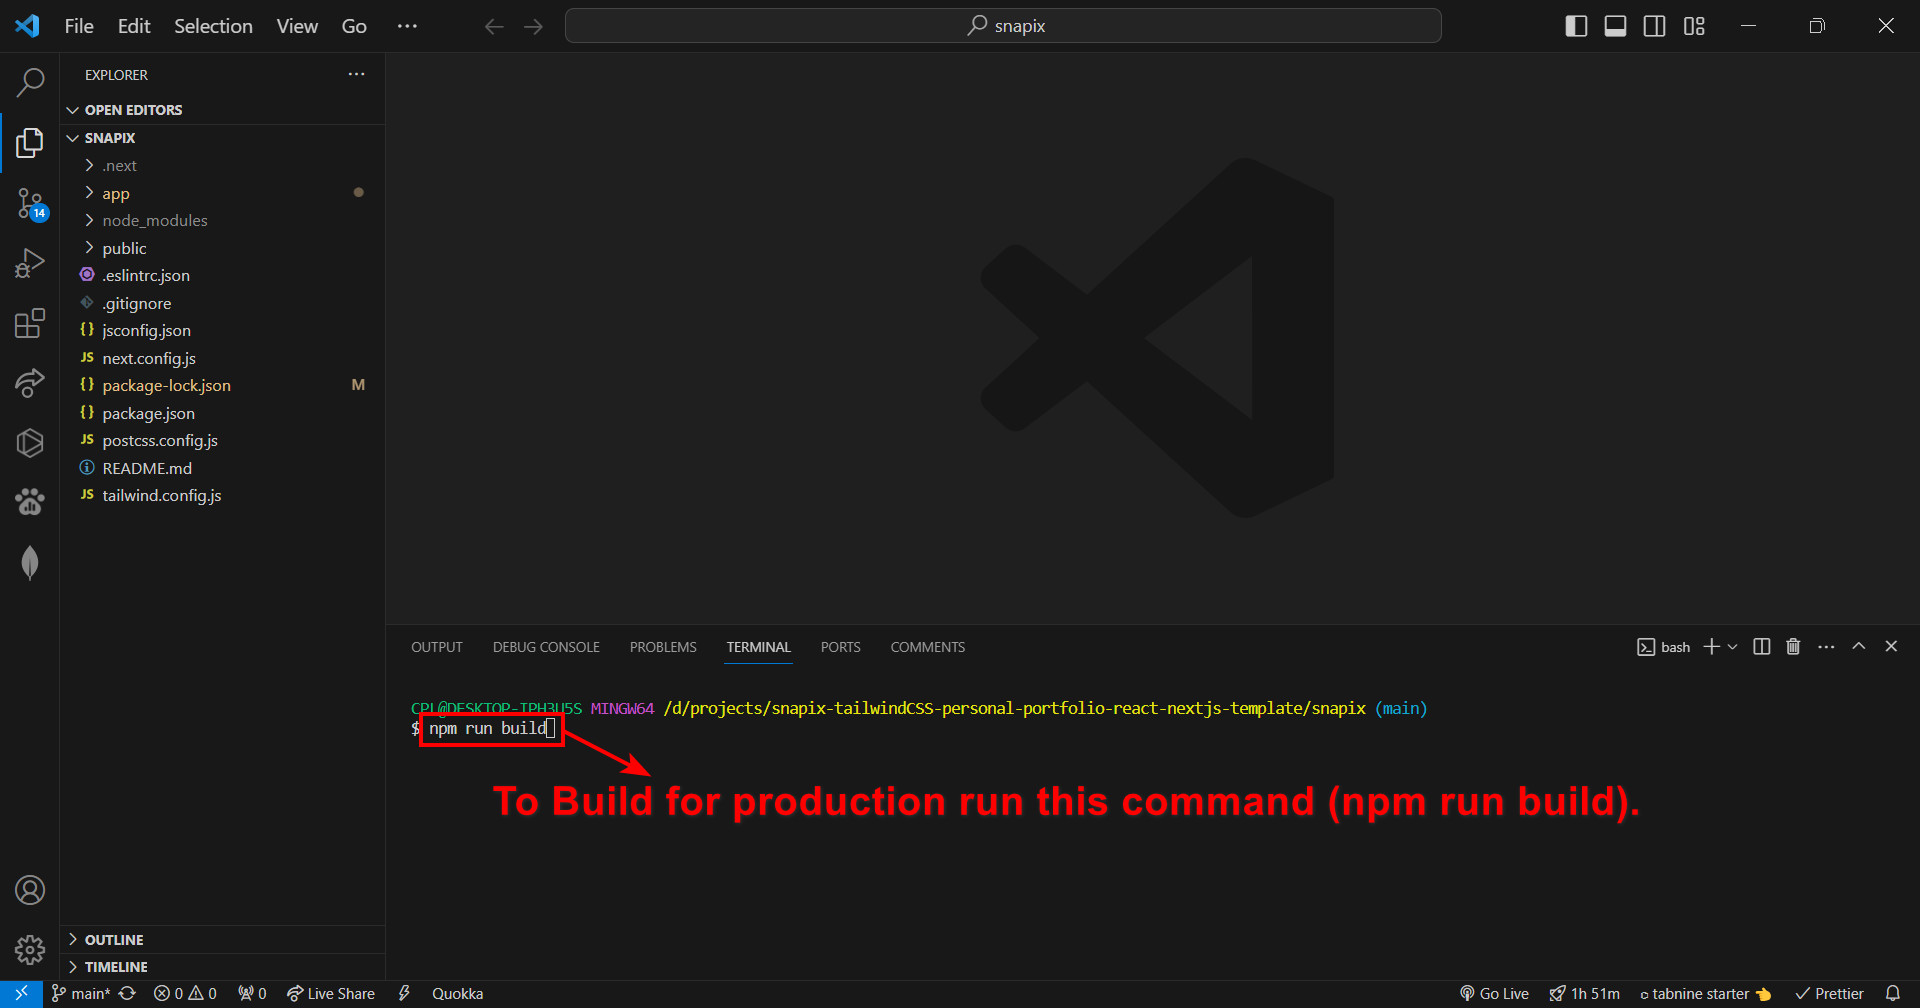
6. To Build for production and launch server run :
npm run build
then
//===== or
yarn run build
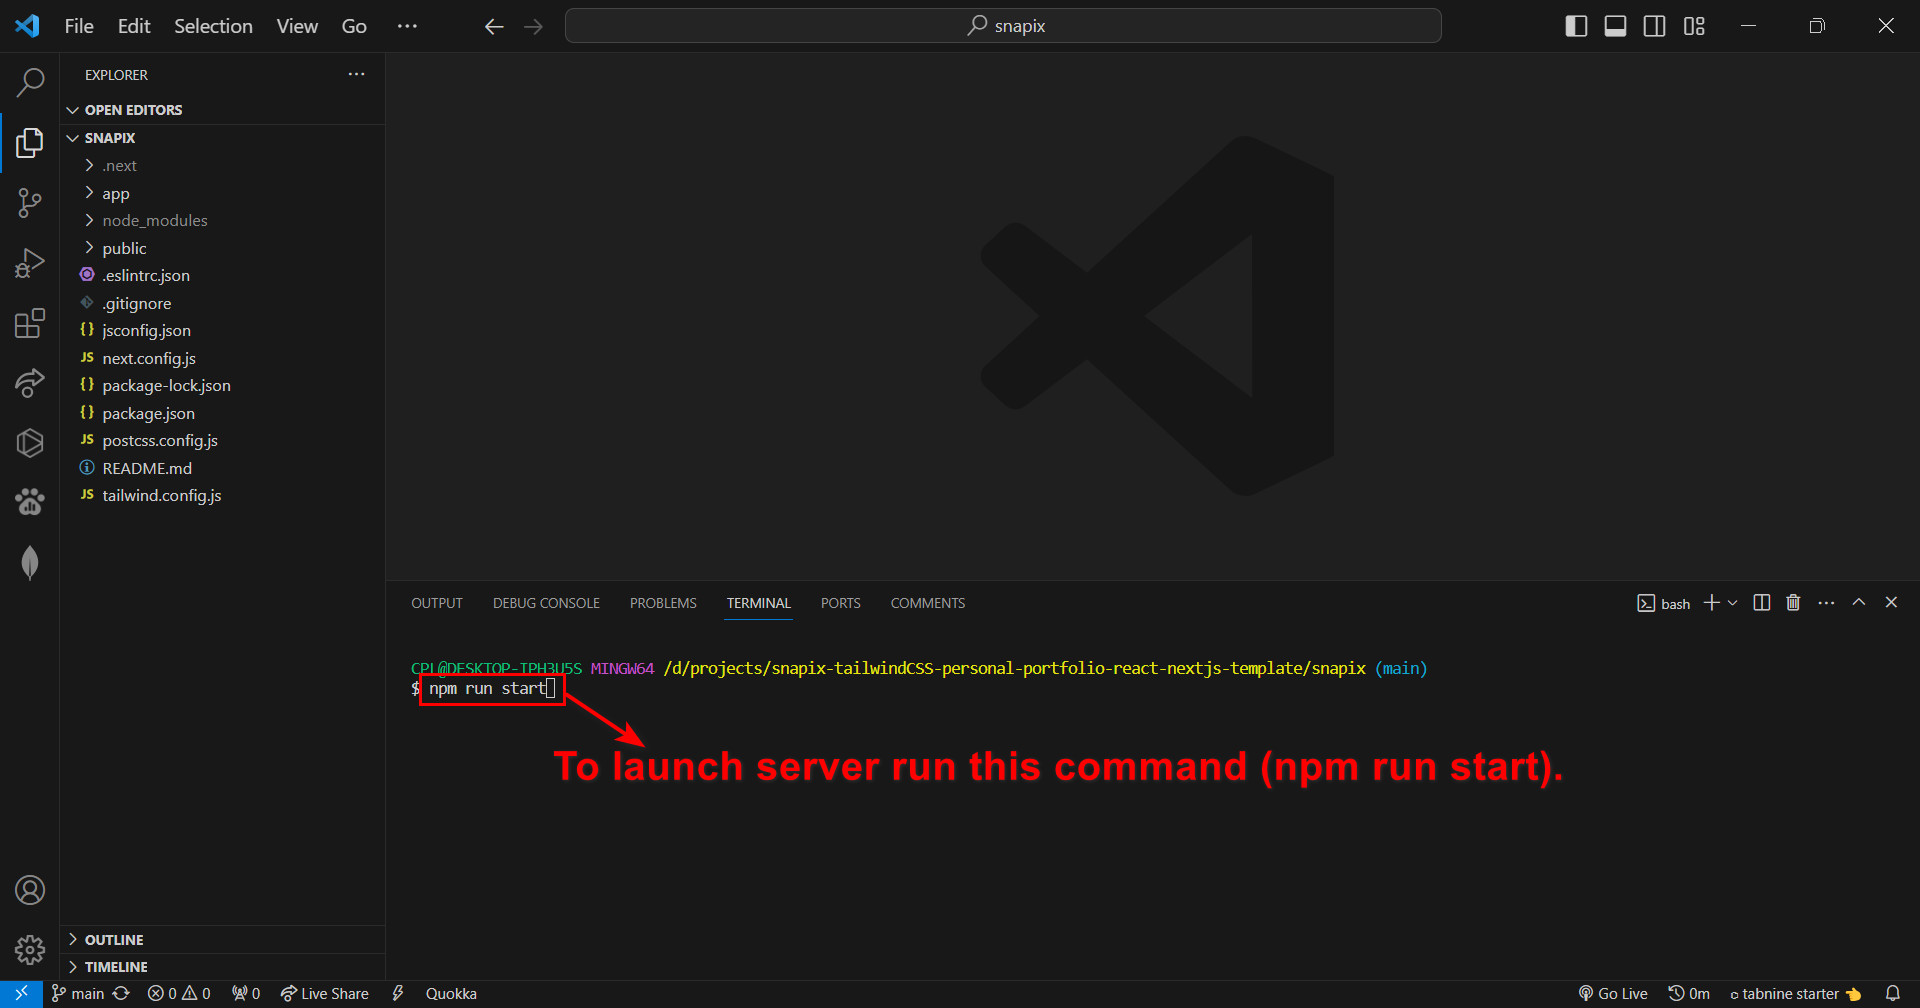
npm run start
//===== or

                    yarn run start
7. Deploying to Vercel - https://www.youtube.com/watch?v=_8wkKL0LKks
=============================
1. Open project on your editor:
2. Open the terminal as a root directory and run the command npm install

3. To Build for production run the command in your terminal npm run build
3. To launch server run the command in your terminal npm run start
# Changing Content
1. To Changing Brand Logo
snapix/app/components/header.jsx and footer.jsx
header.jsx
(footer.jsx) like this one.
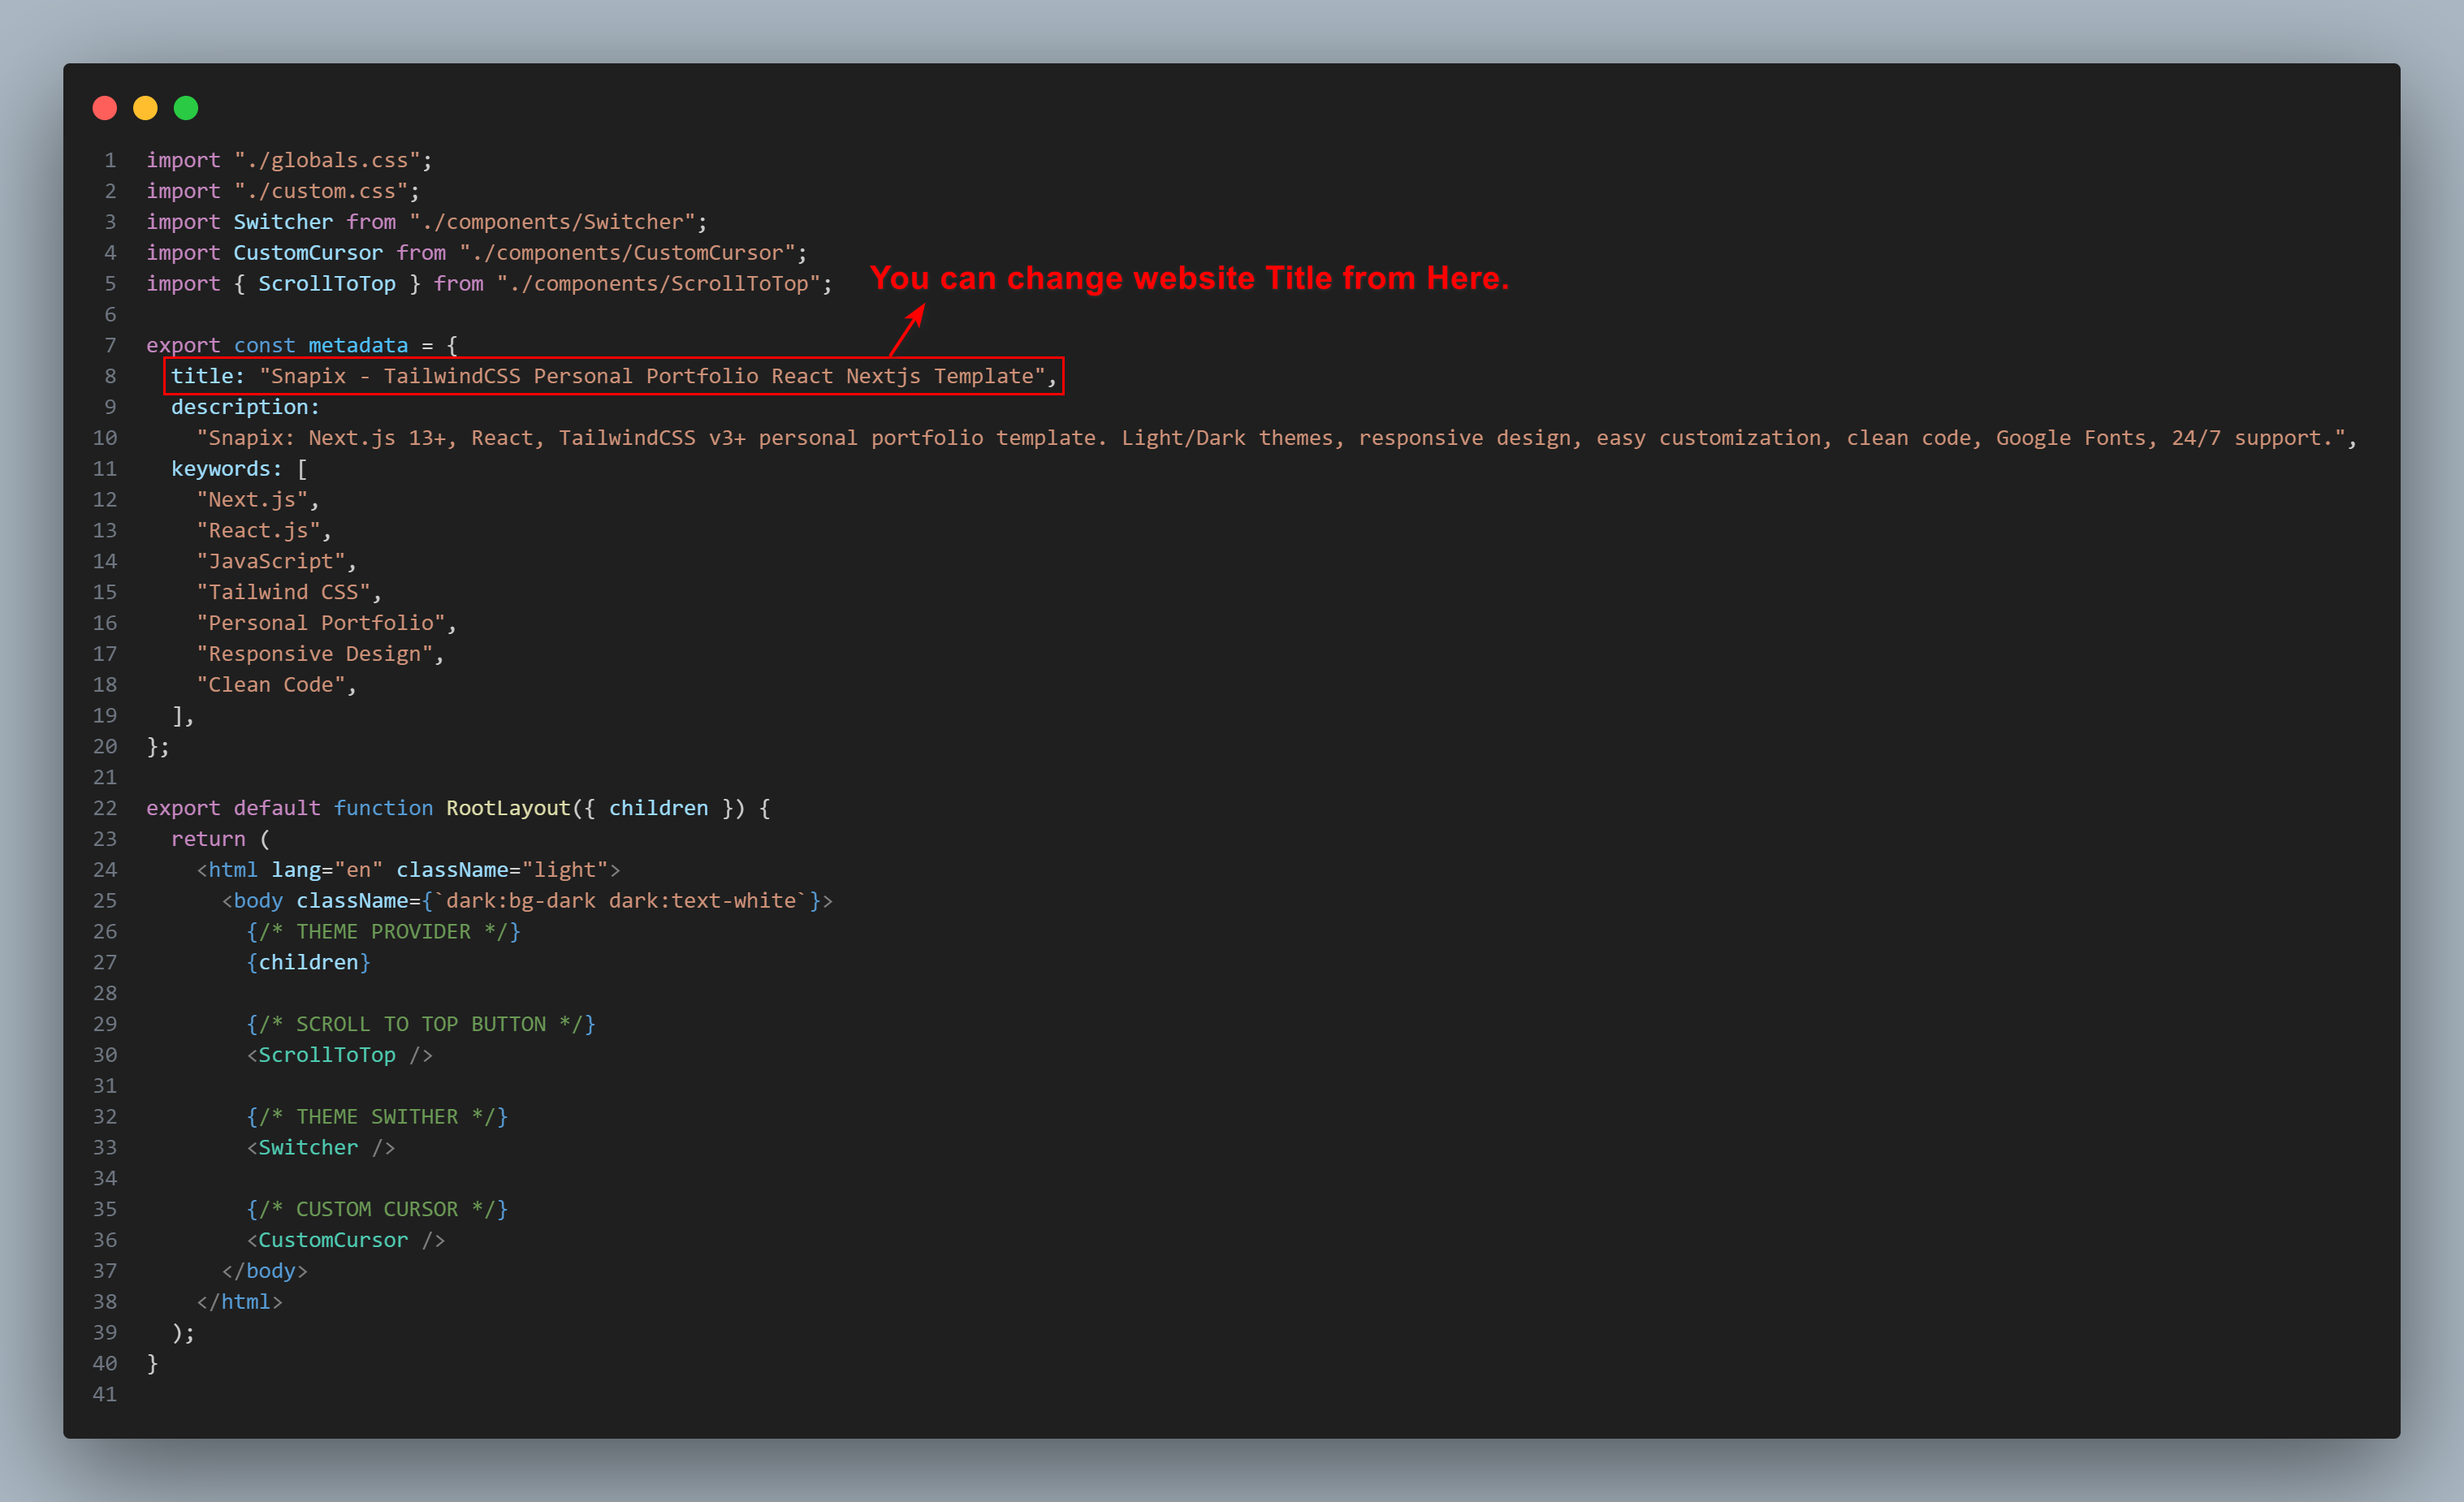
2. To Changing Website Title
snapix/app/layout.js
layout.jsx
3. To Changing
Skill, Service, Portfolio, Pricing and Testimonial Data
snapix/app/data.js

# Sources and Credits
- React.js
- Next.js
- React Icons
- SwiperJs React
- Google Fonts
- Talwind Css 3+
- Talwind Animated
- Talwind Merge
- React Toggle Dark Mode
- Framer Motion
- Free pic
# Support Desk
After purchasing, If you have any further questions about this template, feel free to contact us via TemplateMonster Support System.
Copyright © 2023 MKTemplateWizard . All Right Reserved